2' x 3' N Scale Mini Layout
- Stephen Strum

- Jul 13, 2020
- 3 min read
Updated: Jan 30, 2024
A small layout packed full of detail and operating potential.

This small N scale layout was built between mid-2014 and late 2015. The goal was to produce a small, easily portable layout that allowed for two trains to run continuously and also provide some switching opportunities. This layout accomplished those goals and was an enjoyable project.
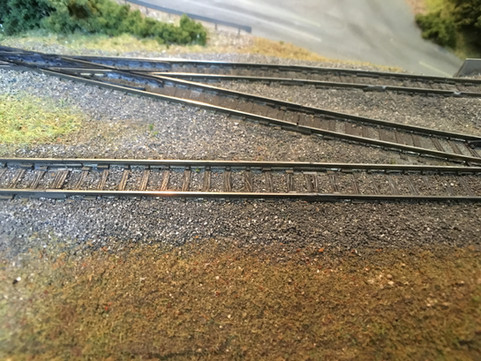
Kato Unitrack was used for all the track on the layout and, all the Unitrack was painted, weathered, and ballasted which resulted in very robust, yet still good-looking track work. I didn't want to use finer scale code 55 Atlas or other track since this was a portable layout and Unitrack is exceptionally durable.
Here are some images showing the general track layout. All turnouts are #6, which are generally more reliable than the #4 turnouts, and the minimum radius on the lower level is 8.5", while the upper-level minimum radius is a tight 6". The upper level was designed for a small tram, but small engines and shorter freight cars can also make it around those curves.


Track List
20010, N Kato Unitrack 20010. Straight 7.32". 3
20020, N Kato Unitrack 20020. Straight 4.88". 1
20040, N Kato Unitrack 20040. Straight 2.44". 1
20048, N Kato Unitrack 20048. Buffer/Bumper Type C, 1.99". 3
20071, N Kato Unitrack 20071. Straight 1.14". 8
20100, N Kato Unitrack 20100. Curve radius 9.8", angle 45º 5
20101, N Kato Unitrack 20101. Curve radius 9.8", angle 15º 2
20110, N Kato Unitrack 20110. Curve radius 11.1", angle 45º 1
20140, N Kato Unitrack 20140. Curve radius 15", angle 30º 1
20170, N Kato Unitrack 20170. Curve radius 8.5", angle 45º 5
20171, N Kato Unitrack 20171. Curve radius 8.5", angle 15º 4
20203, N Kato Unitrack 20203. Right turnout 7.32". (remote) 3
20301, N Kato Unitrack 20301. Crossing 7.32". 15º (right) 1
20505, N Kato Unitrack 20505. Curve radius 9.8", angle 45º (viaduct) 2
24818, N Kato Unijoiner 24818 8

Here is the track plan for the top level. The curved pieces are the ~6" radius curves that came with the compact track kit and are available for purchase separately. One 4.88" straight section is used, one 4.88" viaduct section, two 2.5" straight sections (20030), and one of the 1.79" (usually listed as 1 3/4") straight sections that are part of the Kato small track assortment. Alternatively, you can use two of the 1.79" sections and four of the 1.14" straight sections (part of the small track assortment pack) on the left side, which is probably a slightly more accurate fit, but both should work ok.
The somewhat larger curves on the lower level allow for engines like a GP 38-2 to pull modern 50-60 foot freight cars without difficulty. The larger rolling stock will overhang quite a bit on the curves but still make it around ok.
The layout is built using foam insulation board on a wood frame, with spray foam used to fill in gaps in the foam layers. The foam was carved and sanded to produce the various terrain, with rock castings and other scenery items, then glued on and blended in with lightweight wall spackle.
The terrain was painted, then layers of dirt, foam, and static grass were used to simulate ground cover, with various trees then added. The structures on the layout are all readily available kits, though some were kit-bashed to fit the area they were to be placed in. All were painted with spray paint and then lightly weathered with powdered chalks.
I kept track of the items and costs used to build the layout, and you can see the tables of materials and costs (as of 2014-15) below.

Here are a bunch more photos of the layout. This is probably my favorite layout of all those that I have built thus far. I did sell the layout back in 2016 at a train show after displaying it at a few shows.
I produced a YouTube video series on the construction of the layout, the final video of which is shown below. You can view the entire video series on the Steve's Trains YouTube page.


where can i purchase both Kato G Gage straight and Curved Viaducts - #20505 and #20420
hi steve - I am entranced by the layout- can you separate out the upper track kato pieces for me ..? I have a good 2 x 4 bottom already and would like to add the second level .. thanks
Beautiful layout and especially good ballasting job on the Kato. No matter what I do, when I apply glue the ballast floats onto the ties. What is your process? Thank you!
Hi Steve, just getting into N scale model railroading --- the video series was great. Watched it twice -- so much to pick up. I see the layout and the track listing but can't seem to find the layout with the track numbers showing. I want to make a layout using your layout as a guide. Two separate layouts -the upper and lower -- then maybe someday when I am more experienced combining them. Started to watch your other small layouts on you tube --- GREAT
On this one I built a box to put the controls in and it is attached to the layout by a cable. If you planed to keep it in one spot and the same orientation you could just have a 6x12” board or so on one side to mount everything on.